How to upload your corrections
You will receive an e-mail stating that your galley proof is now available at your ScholarOne Author Center:
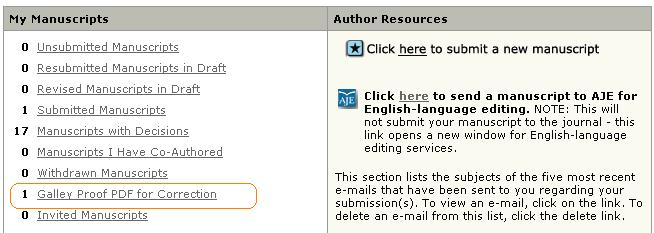
As an author in ScholarOne Production your only task is Galley Proof PDF for Correction. After clicking on the task name the following section is shown right below:
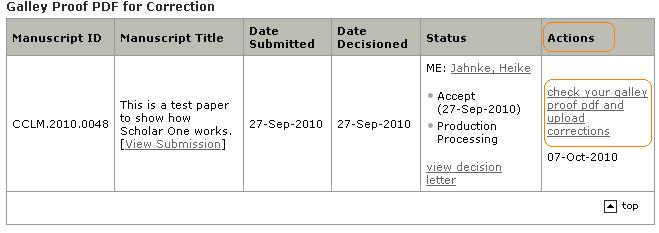
If you click on the Action link, you will be forwarded to the start page to download your galley proof pdf file.
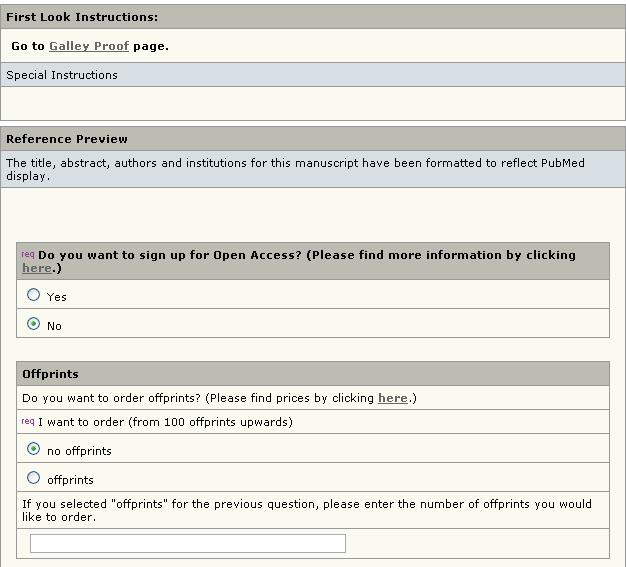
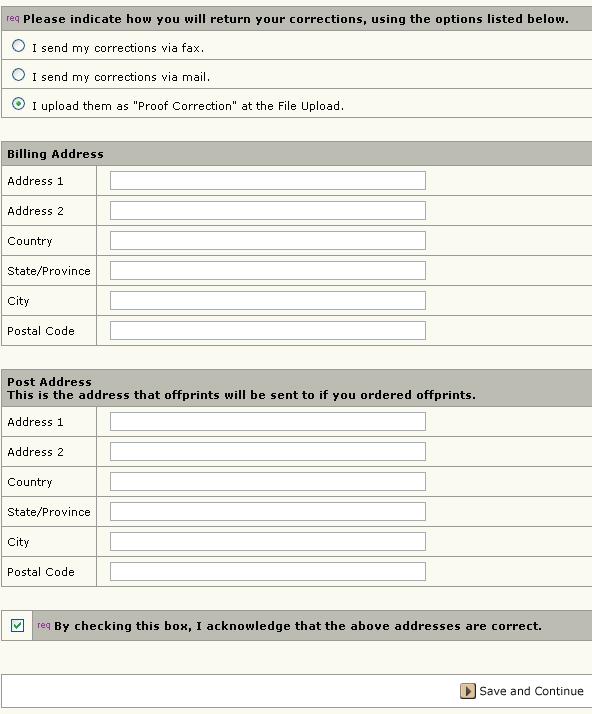
Here you have to answer the questions on Open Access, the offprint order, your billing and post address if applicable. You also need to indicate how you will return your corrections. If you choose not to upload your corrections at the File Upload section, please send them via fax or ordinary mail (You can find the fax number and postal address of the responsible typesetter by clicking on the Read More … link at the top of the page. It is placed right below the instructions.) and select the corresponding option.
After clicking on File Upload you will be able to upload your proof PDF:

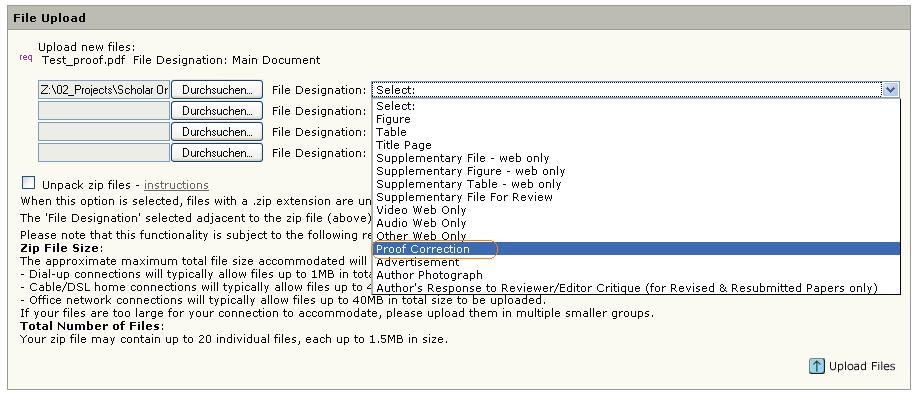
After reviewing your proof you can upload your corrections at the upload fields below. Please always use the File Designation Proof Correction.
Finally, you have to go to Review & Submit to send your corrections:

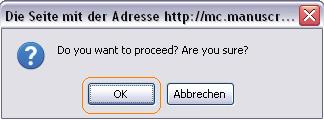
Afterwards a pop-up window appears asking you if you really want to submit your manuscript. Please click OK.
Wie Sie Ihre Korrekturen Hochladen
Sie erhalten eine E-Mail, sobald die Druckfahnen in Ihrem ScholarOne Author Center verfügbar sind:

Als Autor haben Sie im ScholarOne Produktionsprozess genau eine Aufgabe. Diese heißt Galley Proof PDF for Correction. Nachdem Sie auf diesen Link geklickt haben, erscheint unten auf der Seite die folgende Auflistung:

Wenn Sie auf den Link klicken werden Sie auf die Startseite weitergeleitet, wo Sie Ihre Druckfahnen runterladen können.
Hier müssen Sie Angaben zu Open Access und Sonderdrucken machen und gegebenenfalls die Rechnungs- und Postadresse angeben.
Sie müssen auch angeben, wie Sie die Korrekturen zurücksenden. Wenn Sie diese nicht unter File Upload hochladen, schicken Sie sie bitte per Fax oder gewöhnlicher E-Mail (die Faxnr. und Postanschrift des entsprechenden Setzers finden Sie unter dem Link Read More… oben auf der Seite) und wählen die entsprechende Option aus.


Klicken Sie auf File Upload um Ihre Korrekturen hochzuladen:

Nach der Prüfung können Sie Ihre Korrekturen unter Upload new files hochladen. Bitte wählen Sie dabei als File Designation immer Proof Correction.

Um Ihre Korrekturen einzusenden, gehen Sie bitte zu Review & Submit und klicken auf Submit:

Es öffnet sich dann ein neues Fenster, indem Sie die entgültige Einreichung erneut bestätigen müssen. Klicken Sie auf OK.

