How to assign a reviewer
You will receive an e-mail stating that a new manuscript was assigned to you. To start the referee process please log in into your journalsite.
Within your center click on Awaiting EIC Reviewer Selection.

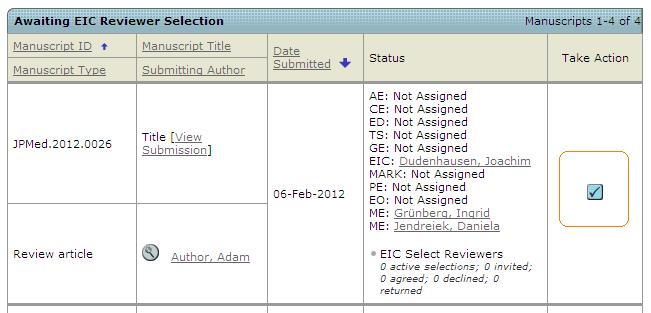
To assign a reviewer please click on the Take Action button. Inside the details page now opens a range of possibilities.
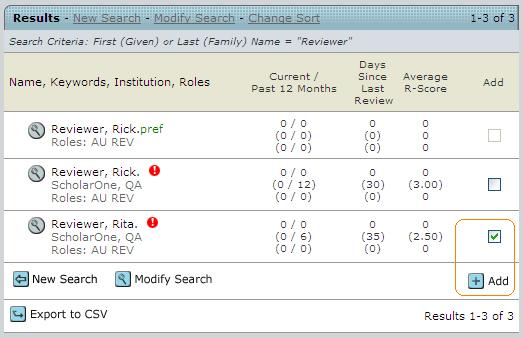
The first option is to select a reviewer preferred by the author. For this you need to tick the box for the preferred reviewer and confirm by clicking the Add button:

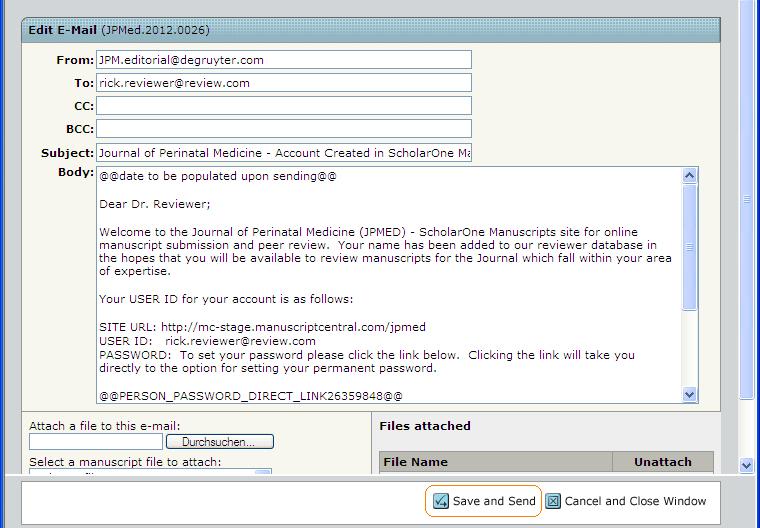
Afterwards an E-Mail-Template opens up where you can insert further information if needed. To send the E-Mail click Save and Send.
As second option you can use the “Quick Search” if you assume that the reviewer is already registered inside the system. Use a “*” for truncation.

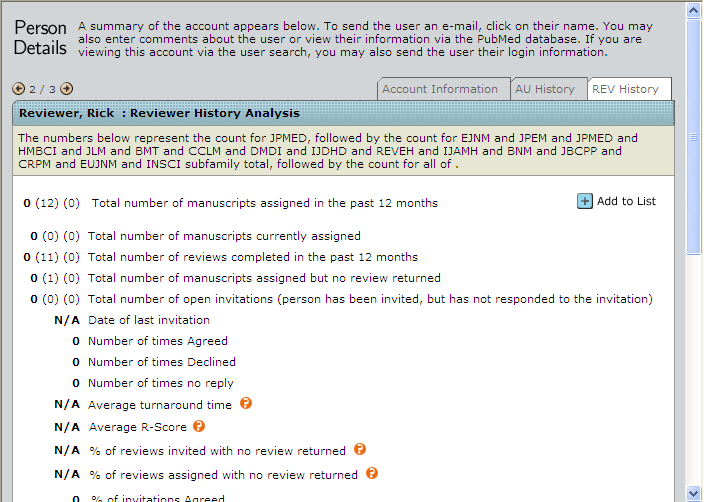
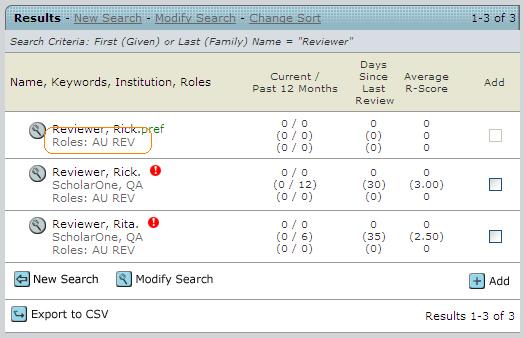
The results offer a lot of information. By clicking the button left from the person's name a pop-up window appears which gives you access to the account information and an overview about the activity as Reviewer:
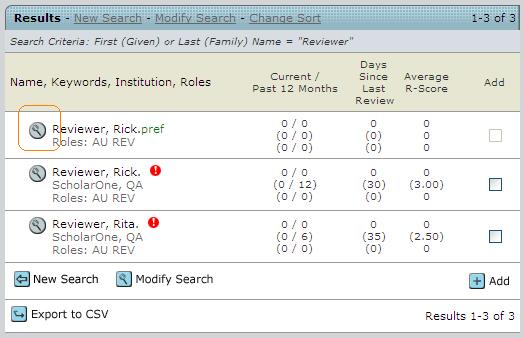
Underneath the reviewer's name you find an overview about all roles the person is connected with.
After a person has been chosen please confirm with Add.
The third option is to use “Create Reviewer Account” if you want to choose a person as reviewer who is not inside the Degruyter database.
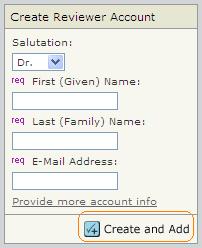
If you have filled in the needed information and confirmed with the Create and Add button an E-Mail will open which contains all required information and the access data for the person. To send the E-Mail confirm with Save and Send.
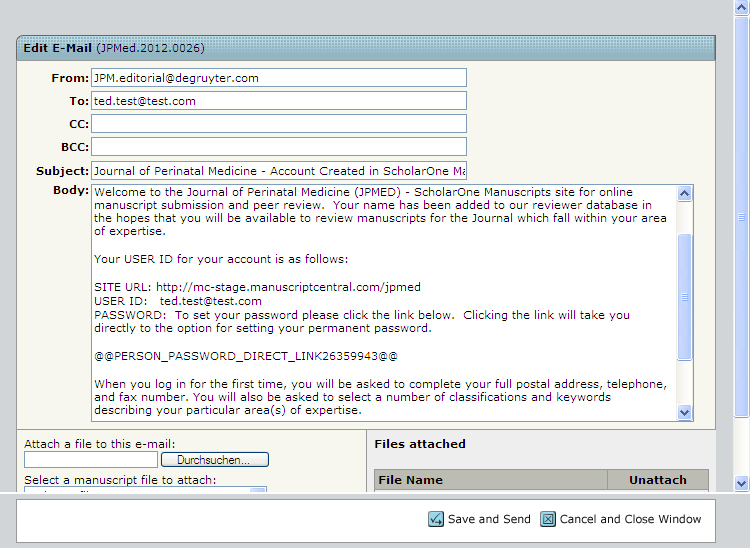
All information are then copied into the edit mask:

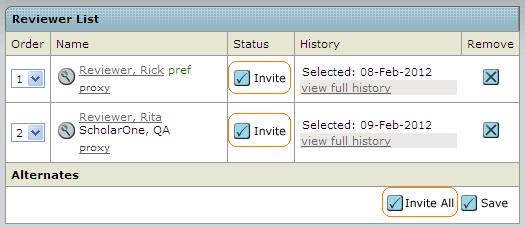
Either if you want to assign a reviewer preferred by the author or a reviewer who is already registered inside the system or if you create a new reviewer account, the next step is to sent out an invitation to the reviewer. Therefore you can use the button Invite or if you want to invite all reviewers which you have put to the list you can use the button Invite All.
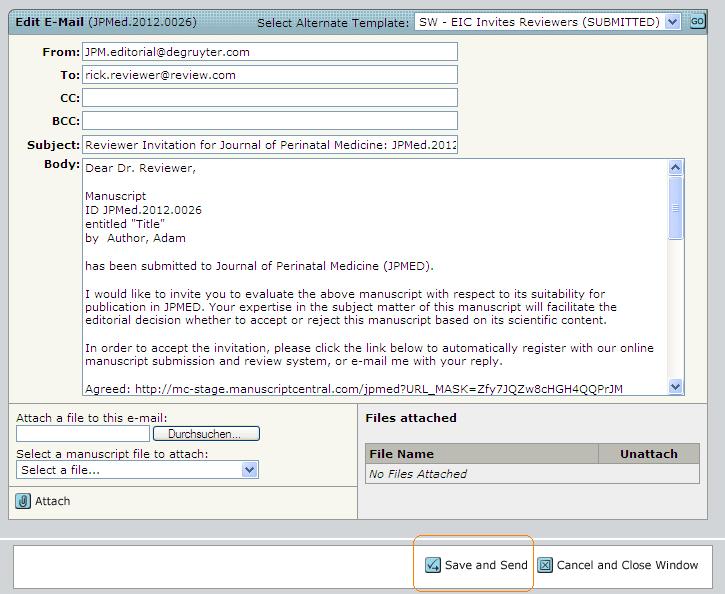
After you have confirmed with Invite an E-Mail opens. If you want you are able to overwork this E-Mail. At the end confirm with Save and Send.
After confirmation opens a select field. There is either the possibility to let the author confirm that he wants to take care of the paper - this will be possible within a link inside the send E-mail or you confirm on behalf of the author. After the author has decided to create the submission he gets again an E-Mail and inserted in this E-Mail he will find the link to get access to the manuscript.

Wie Sie einen Gutachter zuweisen
Sie erhalten eine E-Mail sobald Ihnen ein neues Manuscript zugewiesen wurde. Melden Sie sich bitte an um den Gutachterprozess zu starten.
Als nächstes folgen Sie innerhalb Ihres Centers dem Aktionslink Awaiting EIC Reviewer Selection.

Um einen Gutachter einzuladen klicken Sie bitte den Take Action Button. Es öffnet sich innerhalb der Manuskriptansicht ein Auswahlmenü.

Als erste Möglichkeit können Sie einen Gutachter auswählen, welcher vom Autor als “preferred reviewer” hinterlegt wurde. Dafür müssen Sie bei “Add” einen Haken setzen und diese Auswahl mit dem + Add Button bestätigen:

Danach öffnet sich eine E-Mail in der der Account des ausgewählten Gutachters kreiert wird. Zum versenden der E-Mail bitte mit Save and Send bestätigen.

Als zweite Möglichkeit können Sie einen Gutachter über die “Quick Search” suchen, wenn Sie vermuten, dass der potenzielle Gutachter bereits innerhalb des Systems registriert ist. Mit einem “*” können Sie Ihre Suche trunkieren.

Die Ergebnisliste bietet ihnen vielfältige Möglichkeiten. Wenn Sie den Button rechts vom Namen anklicken öffnet sich ein Fenster, welches Ihnen Account-Informationen und die Tätigkeitsstatistik der Person als Reviewer zeigt:


Unterhalb des Namen des Gutachters finden Sie einen Kurzüberblick über die der Person zugeordneten Rollen.

Nach Auswahl der Person mittels Markierung bitte mit Add den Arbeitsschritt abschließen.

Als dritte Möglichkeit können Sie die “Create Reviewer Account”-Funktionalität nutzen wenn Sie eine Person wählen möchten, welche dem System unbekannt ist.

Haben Sie alle Angaben ausgefüllt und mit Create and Add bestätigt, dann öffnet sich eine E-Mail, welche alle notwenigen Informationen für den Systemzugang enthält. Zum versenden der E-Mail bitte mit Save and Send bestätigen.

Alle eingegebenen Angaben werden danach sofort in die Ausgabemaske übernommen:

Unabhängig welche der drei Möglichkeiten Sie nutzen, um einen Gutachter auszuwählen, der nächste Schritt ist immer dem Gutachter eine Einladung zu schicken. Dazu die ausgewählte Person mit dem Invite Button benachrichtigen. Wenn Sie alle Gutachter, welche Sie der Liste hinzugefügt haben, einladen möchten, können Sie dieses über den Invite All Button tun.

Mit der Bestätigung auf Invite öffnet sich die Benachrichtigungs-E-Mail, die im System als Standard hinterlegt wurde. Sie können in dieser - wenn gewünscht - Änderungen vornehmen. Bitte bestätigen Sie zum Schluss mit Save and Send.

Es ändert sich die Anzeige in der Form, als dass ein Auswahlfeld geöffnet wird. Es besteht die Möglichkeit, dass Sie den Gtachter antworten lassen - dieser hat für alle Auswahlmöglichkeiten in seiner E-Mail einen Link. Oder Sie bestätigen die Auswahl für den Gutachter. In der nächsten an den Gutachter versandten E-Mail erhält er den Link für den Manuskriptzugang.


