This is an old revision of the document!
How to invite an author
Stub Creation
The first step in the invitation workflow is to create a manuscript stub.
HINT: It’s called invitation workflow because authors cannot submit on their own. An invitation is needed.
You have to log in into your journalsite. Then go to the Assistant Managing Editor Center.

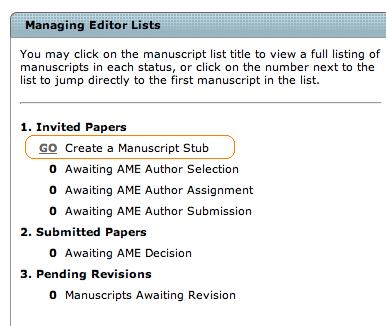
Use the Go … Create a Manuscript Stub task.
A Manuscript draft window opens.
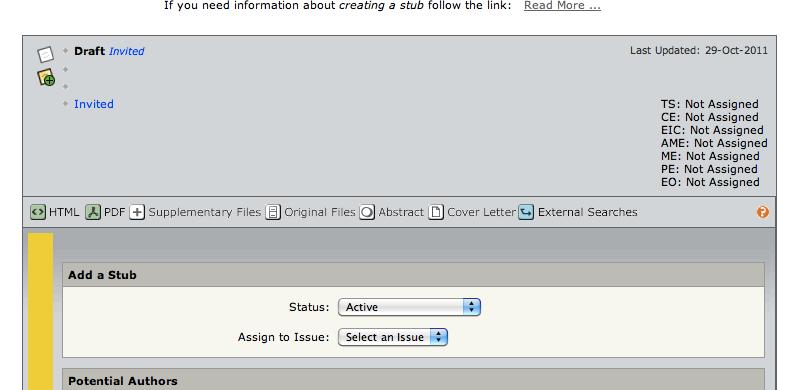
Insert the title of the Manuscript you want to create.
NOTE: The onliest required information is the manuscript type and manuscript title information. All other information is additional. Furthermore the author has to fill out the rest of information within the submission process. Don't be confused about the req statements.

HINT: If you want to avoid, that the author changes the title mark the field read-only for Author.
Click Commit Stub if you want to go on with this one. If you want to create another stub you have to use Commit Stub and Create Another.

Add an author
After a stub has been created the AME has to add an author. You could see the next task also inside the Manuscript Information – in this case this would be Select Authors.
Go to the task tab.

Scroll down to the step Quick Search. Enter the name of the Author you want to invite.

Select the Author you want to invite and click on the Add button.
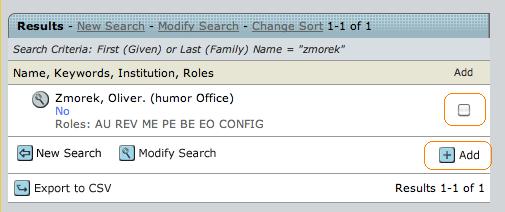
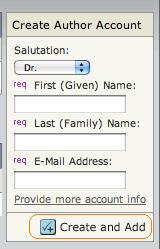
If your search has no results – create an account with help of the Create Author Account.
Assign an author
Adding an author means not assigning him. The assignment is the last step to complete the stub process. To assign the selected author you have to click the Assign button:

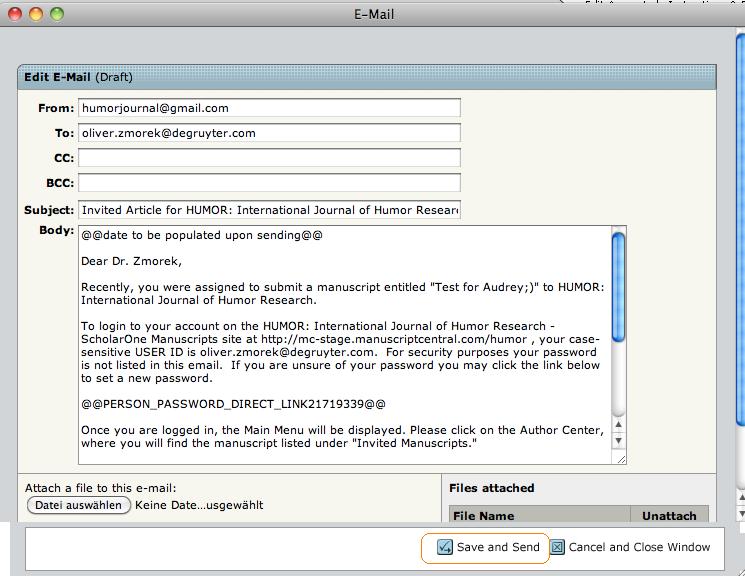
An E-Mail-Template opens up where you could insert further information if needed. To send the E-Mail click Save and Send.
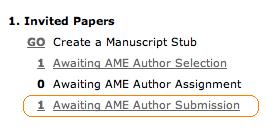
In case that the author itself has to submit the paper, you find the stub until the authors has done the submission inside the Awaiting AME Author Submission.
Submit a Manuscript proxy for the Author
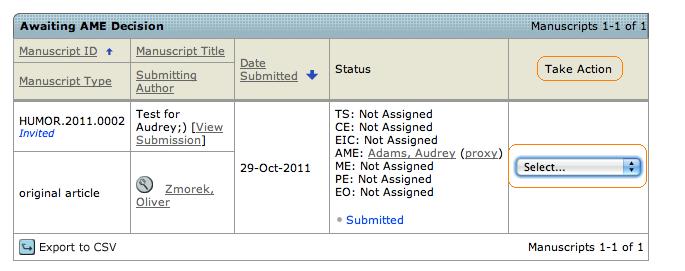
In case that you proxy for the Author submit the paper: Go to the task Awaiting AME Author Submission. Inside the next window go to Select inside Take Action and click on View Details.

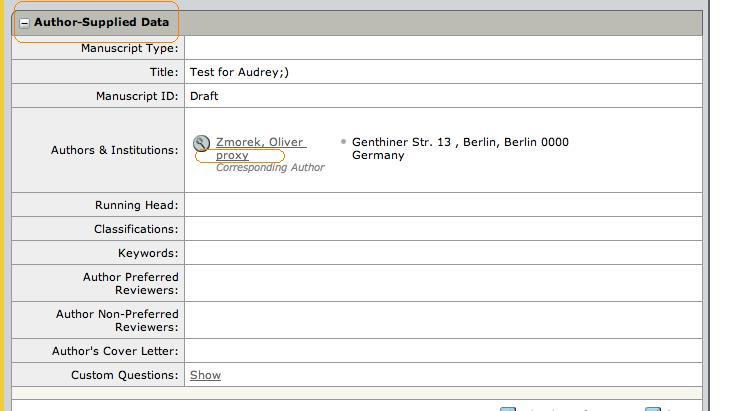
Inside the Manuscript Information page go to the Author Supplied Data field and click proxy.
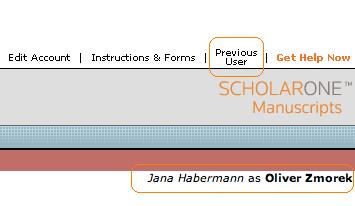
That you are using the system with help of the proxy-functionality you could see on the right window side. To get back to your own role use Previous User.
Go to the Author Center of the selected person.

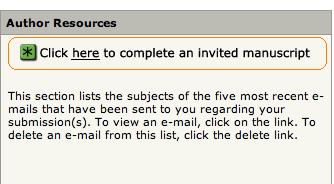
Use the task Click here to complete an invited manuscript.
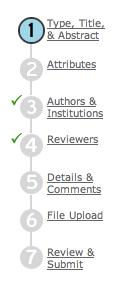
The next window shows the steps that are needed to complete to submit the paper.
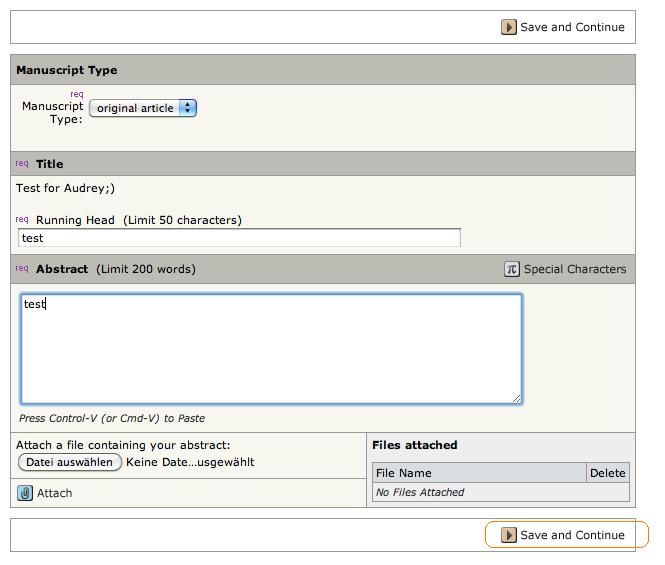
The information marked with a purple req are required to deliver during the submission process. Each step you have to complete with Save and Continue.
During the file upload process choose the document you want to submit and click Upload Files.
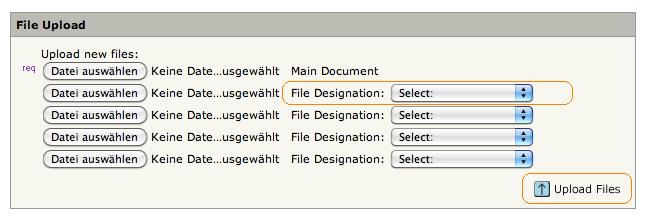
After the upload you could check if the file is the right one with help of the button HTML or PDF.

If all information delivered – all tasks have a green check mark.
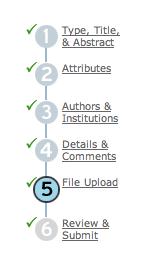
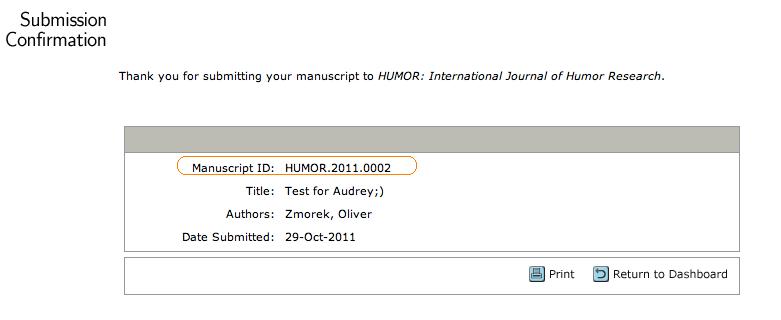
To submit the paper finally click the Submit button. At the end you have to confirm the submission. Finally you get the Manuscript-ID.

Wie Sie einen Autor einladen
Stub Creation
Den Prozess beginnen Sie immer mit Hilfe von “Invited Papers → GO Create a Manuscript Stub”.
HINT: It’s called invitation workflow because authors cannot submit on their own. An invitation is needed.
You have to log in into your journalsite. Then go to the Assistant Managing Editor Center.

Use the Go … Create a Manuscript Stub task.

A Manuscript draft window opens.

Es stehen Ihnen alle Felder zur Befüllung offen, so haben Sie die Möglichkeit, dem Autoren möglichst umfassenden Input zum zu erstellenden Paper zu übergeben. Empfohlen wird, dass zumindestens der “Title” angegeben wird.
NOTE: The onliest required information is the manuscript type and manuscript title information. All other information is additional. Furthermore the author has to fill out the rest of information within the submission process. Don't be confused about the req statements.

HINWEIS: Möchten Sie dem Autor nicht mehr die Möglichkeit der Bearbeitung von Feldern zusprechen, so markieren Sie diese Angaben als read-only for Author.
Den Stub legen Sie verbindlich mittels des Button Commit Stub an. Sie verbleiben im Eingabemodus, wenn Sie mit Commit Stub and Create Another bestätigen.

Add an author
After a stub has been created the AME has to add an author. You could see the next task also inside the Manuscript Information – in this case this would be Select Authors.
Go to the task tab.

Scroll down to the step Quick Search. Enter the name of the Author you want to invite.

Select the Author you want to invite and click on the Add button.

If your search has no results – create an account with help of the Create Author Account.

Assign an author
Adding an author means not assigning him. The assignment is the last step to complete the stub process. To assign the selected author you have to click the Assign button:

An E-Mail-Template opens up where you could insert further information if needed. To send the E-Mail click Save and Send.

In case that the author itself has to submit the paper, you find the stub until the authors has done the submission inside the Awaiting AME Author Submission.

Submit a Manuscript proxy for the Author
In case that you proxy for the Author submit the paper: Go to the task Awaiting AME Author Submission. Inside the next window go to Select inside Take Action and click on View Details.


Inside the Manuscript Information page go to the Author Supplied Data field and click proxy.

That you are using the system with help of the proxy-functionality you could see on the right window side. To get back to your own role use Previous User.

Go to the Author Center of the selected person.

Use the task Click here to complete an invited manuscript.

The next window shows the steps that are needed to complete to submit the paper.

The information marked with a purple req are required to deliver during the submission process. Each step you have to complete with Save and Continue.

During the file upload process choose the document you want to submit and click Upload Files.

After the upload you could check if the file is the right one with help of the button HTML or PDF.

If all information delivered – all tasks have a green check mark.

To submit the paper finally click the Submit button. At the end you have to confirm the submission. Finally you get the Manuscript-ID.


