How to invite an author
Stub Creation
To invite an author to submit their manuscript information, the first step in the invitation workflow is to create a manuscript stub.
NOTE: It’s called invitation workflow because authors cannot submit on their own. An invitation is required.
(This applies to all journals that do not use ScholarOne for the peer review process and where ScholarOne only serves as a content check-in system for production.)
Please log in into your journal site. to the Assistant Managing Editor Center.

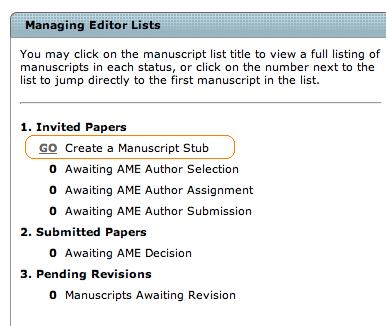
Use the Go … Create a Manuscript Stub task.
A Manuscript draft window opens.
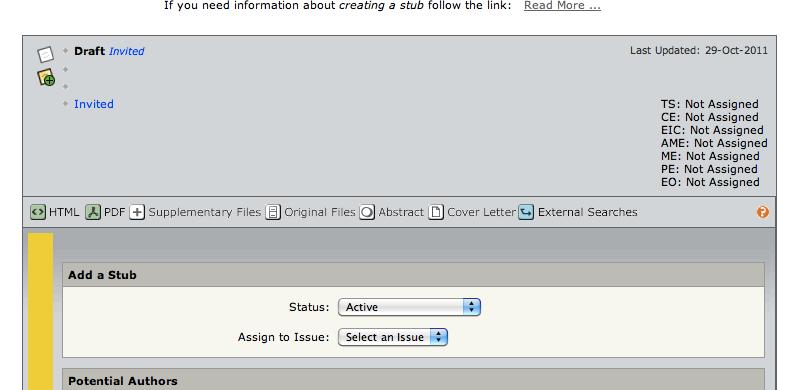
Insert the title of the Manuscript you want to create.
NOTE: The onliest required information is the manuscript type and manuscript title information. All other information is additional. Furthermore the author has to fill out the rest of information within the submission process. Don't be confused about the req statements.

HINT: If you want to avoid, that the author changes the title mark the field read-only for Author.
Click Commit Stub if you want to go on with this one. If you want to create another stub you have to use Commit Stub and Create Another.

Add an author
After a stub has been created the AME has to add an author. You could see the next task also inside the Manuscript Information – in this case this would be Select Authors.
Go to the task tab.

Scroll down to the step Quick Search. Enter the name of the Author you want to invite.

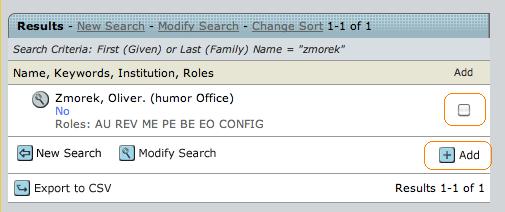
Select the Author you want to invite and click on the Add button.
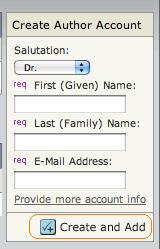
If your search has no results – create an account with help of the Create Author Account.
Assign an author
Adding an author means not assigning him. The assignment is the last step to complete the stub process. To assign the selected author you have to click the Assign button:

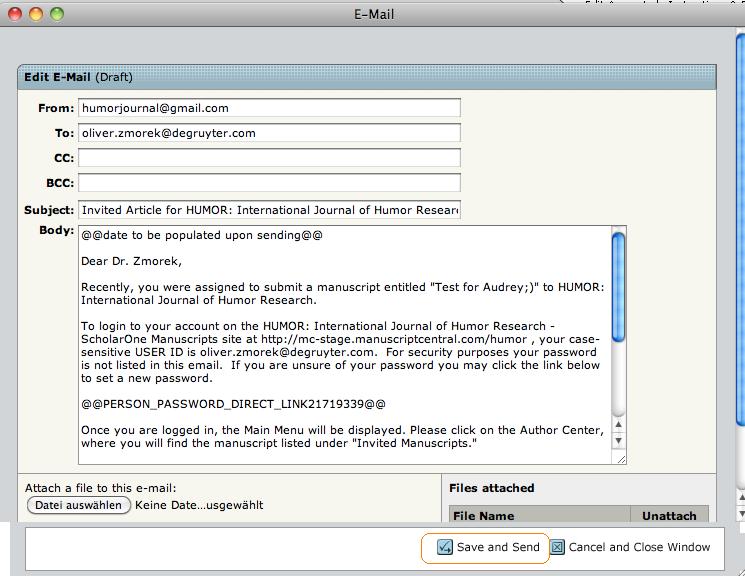
An E-Mail-Template opens up where you could insert further information if needed. To send the E-Mail click Save and Send.
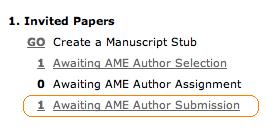
In case that the author itself has to submit the paper, you find the stub until the author has done the submission inside the Awaiting AME Author Submission.
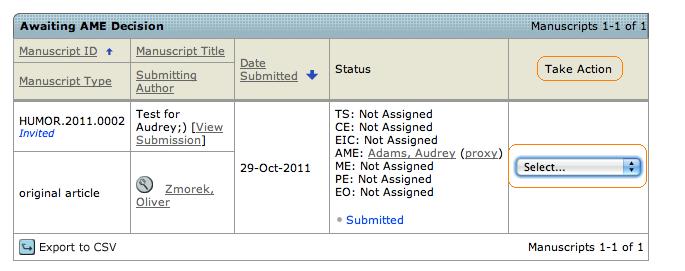
Submit a Manuscript proxy for the Author
In case that you proxy for the Author submit the paper: Go to the task Awaiting AME Author Submission. Inside the next window go to Select inside Take Action and click on View Details.

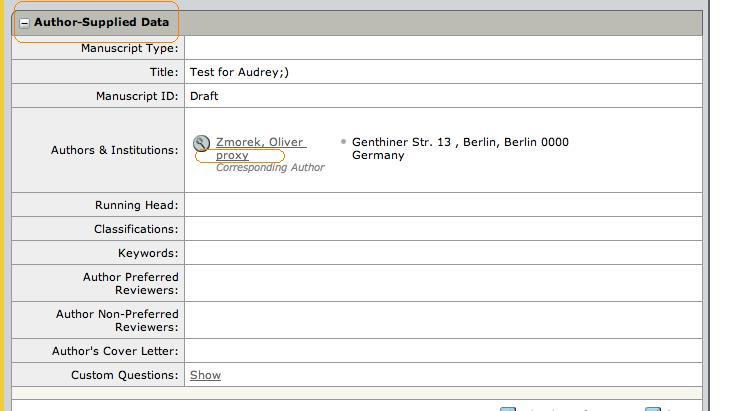
Inside the Manuscript Information page go to the Author Supplied Data field and click proxy.
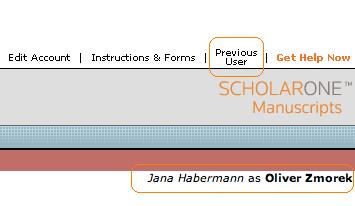
That you are using the system with help of the proxy-functionality you could see on the right window side. To get back to your own role use Previous User.
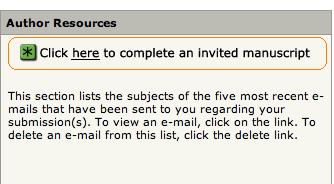
Go to the Author Center of the selected person.

Use the task Click here to complete an invited manuscript.
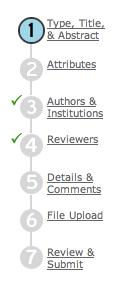
The next window shows the steps that are needed to complete to submit the paper.
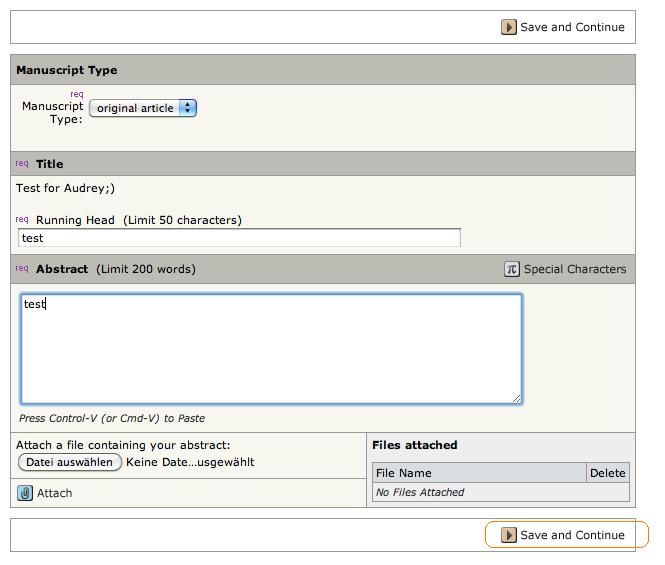
The information marked with a purple req are required to deliver during the submission process. Each step you have to complete with Save and Continue.
During the file upload process choose the document you want to submit and click Upload Files.
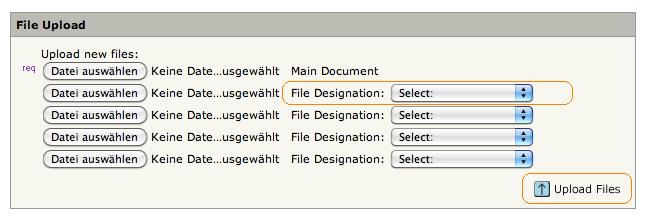
After the upload you could check if the file is the right one with help of the button HTML or PDF.

If all information have been delivered – all tasks have a green check mark.
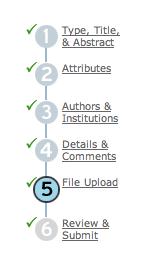
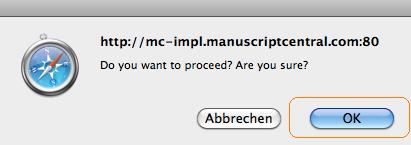
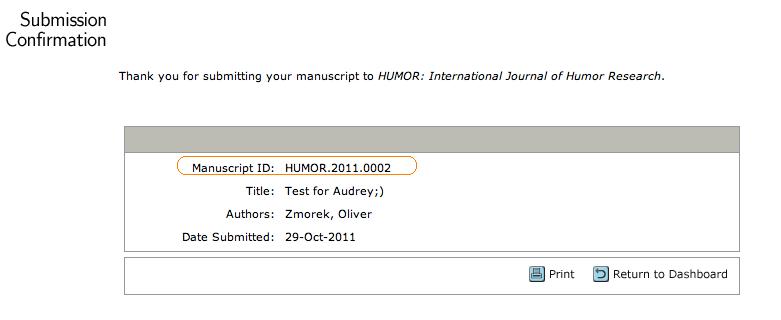
To submit the paper finally click the Submit button. At the end you have to confirm the submission. Finally you get the Manuscript-ID.
Wie Sie einen Autor einladen
Erstellung eines Stub
Nach Anmeldung im System beginnen Sie den Einladungsprozess immer mit Hilfe des Links GO Create a Manuscript Stub innerhalb Ihres Assistant Managing Editor Center.
HINWEIS: Der Prozess wird Einladungsprozess genannt, da Autoren nicht allein ein Manuskript einreichen können. Eine Einladung wird benötigt.


Es stehen Ihnen alle Felder zur Befüllung offen, so haben Sie die Möglichkeit, dem Autoren möglichst umfassenden Input zum zu erstellenden Paper zu übergeben. Empfohlen wird, dass zumindestens der “Title” angegeben wird.

HINWEIS: Die einzigen erforderlichen Informationen sind Manuscript Type und Manuscript Title. Alle weiteren Informationen sind ergänzend. Der Autor muss diese dann während seines Einreichungsprozess ausfüllen. Wundern Sie sich also nicht, wenn weitere Felder als erforderlich markiert sind.

HINWEIS: Möchten Sie dem Autor nicht mehr die Möglichkeit der Bearbeitung von Feldern zusprechen, so markieren Sie diese Angaben als read-only for Author.
Den Stub legen Sie verbindlich mittels des Button Commit Stub an. Sie verbleiben im Eingabemodus, wenn Sie mit Commit Stub and Create Another bestätigen.

Einen Autor hinzufügen
Nachdem ein Stub angelegt wurde, muss nun noch ein Autor hinzugefügt werden. Sie können die nächste Aufgabe auch innerhalb der Manuscript Information sehen - in diesem Fall wäre das Select Authors. Gehen Sie nun zu dem Reiter Select Authors.

Scrollen Sie hinab zu dem Schritt Quick Search. Geben Sie den Namen des Autoren ein, den Sie einladen möchten.

Wählen Sie nun den gewünschten Autoren aus und klicken danach auf den Add Button.

Wenn Ihre Suche keine Ergebnisse geliefert hat können Sie mit Hilfe von Create Author Account ein neues Konto anlegen.

Einen Autor zuweisen
Einen Autor hinzuzufügen bedeutet nicht, dass er sofort dem Paper zugewiesen ist. Die Zuweisung ist der letzte Schritt im Einreichungsprozess. Um den ausgewählten Autor zuzuweisen müssen Sie den Button Assign anklicken:

Danach öffnet sich ein E-Mail-Template. Hier können Sie - wenn gewünscht - Änderungen und Erweiterungen vornehmen. Zum versenden der E-Mail bitte mit Save and Send bestätigen.

Wenn der Autor das Paper nun selbst einreicht, finden Sie den Stub solange bis der Autor die Einreichung fertig gestellt hat unter Awaiting AME Author Submission.

Ein Manuskript stellvertretend für den Autor einreichen
Wenn Sie das Paper stellvertretend für den Autor einreichen, gehen Sie bitte als erstes zu der Aufgabe Awaiting AME Author Submission. Der nächste Schritt ist innerhalb des Take Action Drop-Down-Menüs den Punkt View Details auszuwählen.


Anschließend gehen Sie bitte zu den Manuscript Information und klicken dort unter Author Supplied Data auf den Proxy-Link.

In der rechten oberen Ecke können Sie nun sehen, dass Sie eine Proxy-Funktion eingenommen haben. Mit Hilfe von Previous User kommen Sie wieder zu Ihrer eigenen Rolle zurück.

Gehen Sie als nächstes zum Author Center der ausgewählten Person.

Anschließend klicken Sie bitte auf Click here to complete an invited manuscript.

Das sich nun öffnende Fenster zeigt alle Schritte, die zur abschließenden Einreichung des Papers notwendig sind:

Die Informationen, welche mit einem lilanen req markiert sind, müssen während des Einreichungsprozess auf jeden Fall eingetragen werden. Jeden Schritt bitte über Save and Continue vervollständigen.

Bei dem Punkt File Upload wählen Sie das Dokument aus, welches Sie einreichen möchten und klicken anschließend zum eigentlichen Hochladen auf den Button Upload Files.

Nach dem Hochladen können Sie mit Hilfe der Buttons HTML und PDF überprüfen, ob Sie die richtige Datei hochgeladen haben.

Wenn alle erforderlichen Informationen und Dateien geliefert wurden werden alle Schritte mit einem grünen Haken markiert.

Um das Paper endgültig einzureichen klicken Sie bitte auf den Submit Button. Nachdem Sie daraufhin ein letztes Mal die Einreichung mit OK bestätigt haben, bekommen Sie abschließend die Manuscript ID für Ihr Paper.


